
On this page
A vacuum emulsifying mixer can look empty through the sight glass while a ribbon of product still sits behind the scraper or inside the outlet valve. On a line that makes a fragranced cream followed by an unscented lotion, that small amount matters. The first question to ask about the CIP cleaning process is where the wash liquid actually goes.
In brief, a clean-in-place (CIP) cycle for a cosmetic mixer has five steps. Recover the remaining product, pre-rinse the selected circuit, circulate a detergent suited to the residue, rinse to the agreed endpoint and verify the equipment before releasing it. The vessel wall, the rotor-stator housing and the discharge branch can each see different wash conditions. Trace each route on the equipment drawing, record the conditions at the return and select a residue check for the hardest surface to clean. That gives the next shift a practical basis for starting its batch.
Which Mixer Surfaces Does the Cleaning Circuit Reach?
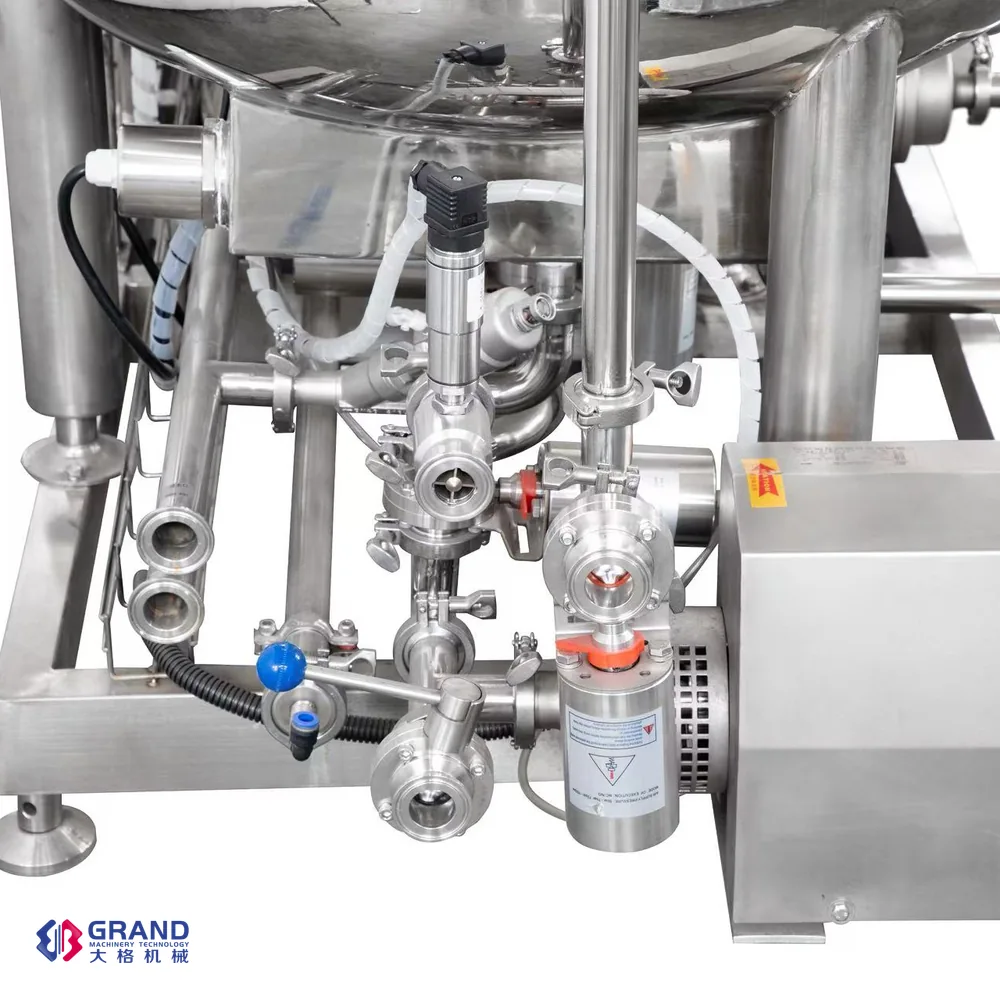
Start where the cream leaves the mixer and work back through the outlet valve to the vessel. Then follow the wash liquid in the opposite direction, from the supply connection to the spray device, through each selected branch and on to the return tank or drain. Mark the required valve positions on the drawing.
Three locations are worth a closer look when you walk the line. Check the installed cleaning circuit: a CIP station does not by itself make every product-contact surface cleanable in place.
- At the scraper blade, check whether liquid reaches the wall behind it.
- At the rotor-stator housing, trace any separate circulation path. Use the equipment instructions to identify parts that require manual cleaning or clean-out-of-place (COP); a vessel spray head alone does not establish coverage of narrow homogenizer passages.
- At the outlet valve and transfer hose, look for a closed branch, a dead leg with little flow or a low point that holds liquid after draining.
The vacuum emulsifying mixer working principle shows where the agitator, homogenizer and discharge sit in the production sequence.
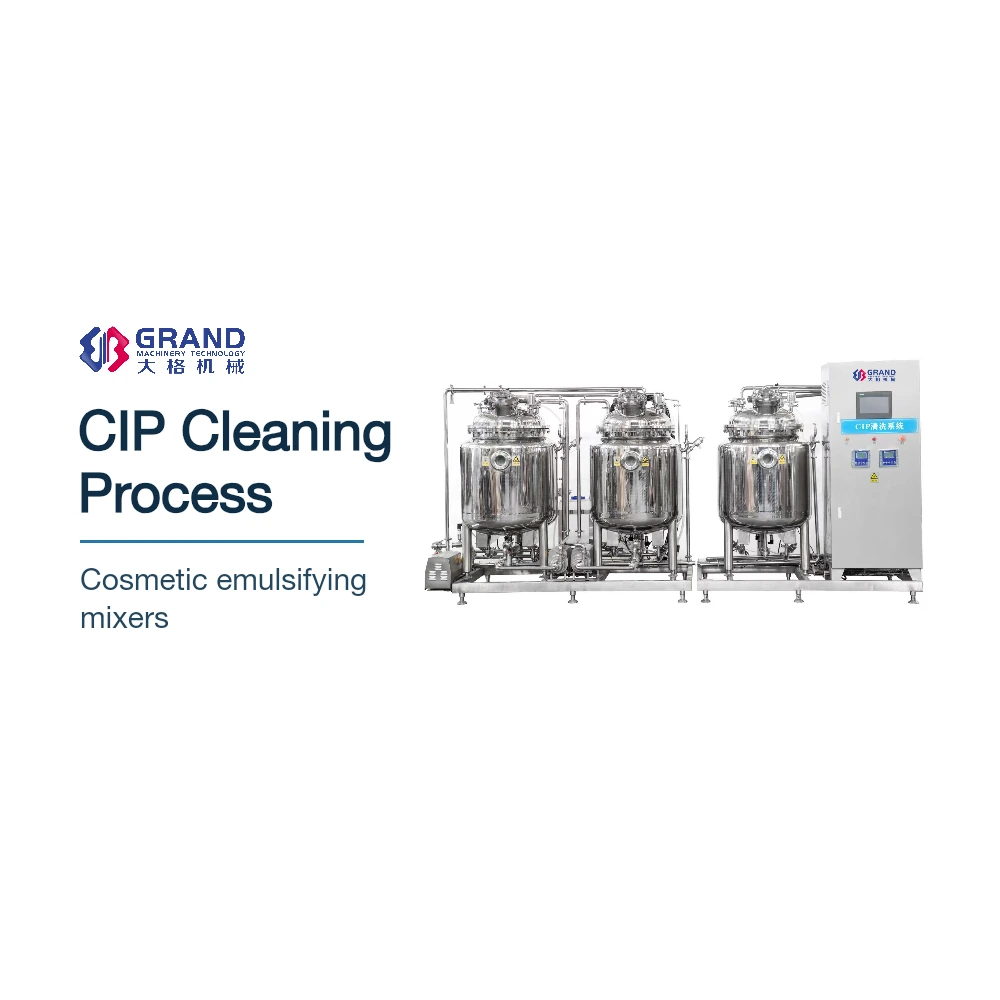
A cleaning head directs liquid inside the vessel. The automated CIP cleaning system shown here supplies the circuit from separate hot-water, alkaline-solution and acid-solution tanks. Its PLC and touchscreen support station operation. The pipework and valve positions on the installed line determine which mixer surfaces each solution reaches.
Five CIP Cleaning Steps After a Cream Batch
Use the sequence below to plan a changeover. The formulation, the condition of the residue and the surfaces in contact with it determine what should happen in each stage. The wash record should show which route was open and what the cleaning liquid did along that route.
From Product Recovery to Release
- Recover product
- Pre-rinse the circuit
- Circulate detergent
- Rinse to endpoint
- Verify and release
A separate acid stage may be needed for mineral deposits. If the final check fails, hold the mixer and investigate the affected circuit before returning it to production.
Swipe sideways or use the arrow keys to read all columns.
| Stage | What to record | What the record tells you |
|---|---|---|
| Product recovery | Last product, end of discharge and time before cleaning | How long the residue stood on the surfaces |
| Pre-rinse | Route, water temperature (°C) and duration (min) | Which circuit received the first rinse |
| Detergent circulation | Agent, measured strength, return temperature and contact time | Whether the wash reached its specified operating conditions |
| Final rinse | Water source, sampling point, temperature and rinse result | Whether the rinse met the site’s endpoint for the agent used |
| Verification and release | Inspection, residue results, deviations and disposition | Whether the equipment can return to production |
Recover Bulk Cream and Check the Return Path
Recover what the equipment can discharge while the batch is still in its normal unloading condition. Note any pool left in the outlet or transfer hose. If the vessel drains readily but a hose stays full, the first rinse sends a slug of concentrated cream into the return. That observation helps explain a cloudy first return and identifies where to improve product recovery.
Choose the pre-rinse conditions for the residue and the construction materials. Check that rinse water can leave every selected path and that the intended drain or recovery route is open. Record an interruption between discharge and cleaning. A trial on freshly emptied equipment may give a different result from a changeover after cream has dried on the wall overnight.
Match the Detergent and Rinse Sequence to the Deposit
Choose the cleaner using a representative soil sample and the supplier’s compatibility data for the product-contact materials and seals. An alkaline detergent can be appropriate for some fatty soils. For a cleaner based on sodium hydroxide (NaOH), check elastomer compatibility for the seals fitted to this circuit. A wax-rich balm, a silicone emulsion and a pigmented cream can each respond differently. A small cleaning trial on the actual residue gives the team a basis for selecting chemistry before testing the full circuit.
Mineral deposits can justify a separate acid stage. Where the site procedure calls for both alkaline and acid cleaning, drain and rinse between the two stages according to the approved chemical instructions. After the last chemical stage, use the specified final-rinse water and test at the agreed sampling point. Follow the chemical supplier’s safety instructions and the site’s approved isolation and disposal procedures; do not mix incompatible cleaning agents. Complete any required sanitization and pre-use checks before release.
For the underlying distinction between removing product soil and dissolving mineral deposits, see the cleaning chapter in the Tetra Pak Dairy Processing Handbook.
Four Controls for an Automated CIP Cycle
The four controls are contact time, temperature, chemical concentration and mechanical action. Ecolab describes how they work together in its guide to cleaning in personal care manufacturing.
Decide where to measure each one. A supply sensor measures what leaves the station. A return sensor measures what comes back after the liquid has passed through the mixer. If the return is still warming up when the timer starts, the surfaces may spend less time at wash temperature than the program display suggests.
Swipe sideways or use the arrow keys to read all columns.
| Control | Measure or calculate | Question for the engineer |
|---|---|---|
| Contact time | Minutes within the specified wash conditions | When does the exposure clock start, and what happens during an interruption? |
| Temperature | °C at defined supply and return points | Which reading shows that the wash has warmed the selected circuit? |
| Detergent strength | Concentration on the supplier’s stated basis, e.g. % by mass | Which test or calibrated conductivity curve applies to this particular detergent? |
| Mechanical action | Branch flow in L/min, pipe velocity in m/s and cleaning-head operating pressure where specified | Do the pipe and the vessel each receive the flow and coverage they require? |
How Much Flow Does Each Branch Receive?
For a full circular pipe, mean velocity equals volumetric flow divided by the internal cross-sectional area.
v = Q / A
Here, Q is the measured branch flow in m³/s and A is the internal area in m². For example, a branch carrying 60 L/min through a 25 mm internal diameter has a flow of 0.001 m³/s and an area of about 0.000491 m². The mean velocity is 2.04 m/s. Split the same total flow equally between two identical branches and each carries 30 L/min at about 1.02 m/s.
This example shows why a pump display alone cannot establish conditions in each branch. Use the actual branch flow and internal diameter for the calculation. For the vessel, check the cleaning head’s required flow and pressure and assess coverage behind the agitator. If production and cleaning share a heat source, specify the two duties separately. The comparison of electric and steam heating for emulsifying mixers explains the production vessel’s jacket duty.
How Do You Verify a Cosmetic Mixer Is Clean?
Cosmetic mixer cleaning validation establishes that a defined procedure repeatedly removes relevant residues to limits the site has justified. Select a representative product that is difficult to clean, document how long it can stand before washing and identify where residue is likely to persist. A swab from an accessible valve seat can answer a different question from a rinse sample drawn at the return.
Choose the test for the residue of interest. Final-rinse conductivity can help detect an ionic cleaning agent when the method is suitable for the detergent and the incoming water. Record the water baseline and return reading at a common reference temperature and in matching units. One mS/cm equals 1,000 µS/cm. A wax film can remain on a shielded surface while the returned water approaches its usual conductivity. An inspection or product-specific test at that surface addresses that risk.
In one lotion changeover documented by Ecolab, the equipment surface looked clean after pre-washing, yet a swab still detected sunscreen actives. The choice of test changed what the operator could see. Ecolab describes the swab results in its cosmetic manufacturing case study.
For a routine changeover, compare the wash record and required inspection or test results with the site’s acceptance criteria. If a check fails, hold the equipment, investigate the affected cleaning path and document corrective actions and repeat-check results before release.
What to Confirm Before Specifying a CIP Setup
Before requesting a quote or integrating a CIP station with a new or existing mixer, share six baseline inputs with your equipment supplier so the tanks, pumps, spray devices and instrumentation match the real line:
- Cleaning circuits and vessel volumes: List the main emulsifying tank, oil/water pre-mix vessels, transfer pipes and any parts requiring manual or COP cleaning.
- Hardest-to-clean formulations: Identify worst-case viscosity, wax, silicone, pigment or fragrance loads and the maximum dirty hold time before washing.
- Available plant utilities: Confirm steam or electric heating capacity, water supply flow, compressed air and effluent drainage limits.
- Cleaning chemistry and elastomer compatibility: Specify intended alkaline, acid or sanitizing agents along with gasket and seal materials on the line.
- Instrumentation and record requirements: Define whether supply/return temperature, flow rate, pH or conductivity sensors and automated batch records are needed for your site’s quality documentation.
- Equipment sizing context: If you are still selecting the mixer itself alongside the cleaning setup, review our emulsification mixer buying guide to align batch capacity and vessel options first.
Frequently Asked Questions
How do you remove high-viscosity cream from a homogenizer?
Start with bulk recovery and check how cleaning liquid reaches the rotor-stator passages. If a film remains, compare a sample of the actual cream with the detergent trial and inspect areas the circuit may bypass. Check the equipment instructions for parts that require separate cleaning before adjusting the wash conditions.
When does a cosmetic mixer need an acid wash?
Use an acid wash when the deposit and the approved cleaning procedure call for it. Mineral scale is one reason to assess an acid stage. Confirm the agent’s compatibility with the vessel, seals and pipework, and include the specified intermediate rinse whenever the procedure changes from alkaline to acidic chemistry.
What final-rinse conductivity should the team accept?
Use the acceptance limit established for the site’s rinse water, cleaning agent and measurement method. Record the sampling point, conductivity units and temperature or compensation basis. If the concern is a product ingredient that contributes little conductivity, select a residue test capable of detecting that ingredient.
What should happen if the wash timer ends before the return reaches temperature?
Treat the run as a deviation if it misses the approved exposure conditions. Review the return trend to find how long the circuit actually stayed within range. The site’s procedure should specify who evaluates the affected equipment, what cleaning must be repeated and which checks are required before production resumes.
Conclusion
A dependable CIP cleaning process for cosmetic mixers depends less on running longer wash timers and more on verifying circuit coverage, return-line wash conditions and residue checks tailored to the hardest soil on the line. If you are planning a dedicated station or integrating automated cleaning with your mixing equipment, review our Automatic CIP Cleaning System specifications or share your batch volume, formulation profile and utility conditions through the inquiry form to discuss a configuration suited to your line.


Sales Manager
 English
 Spanish
 French
 Russian